 Save to Pinterest
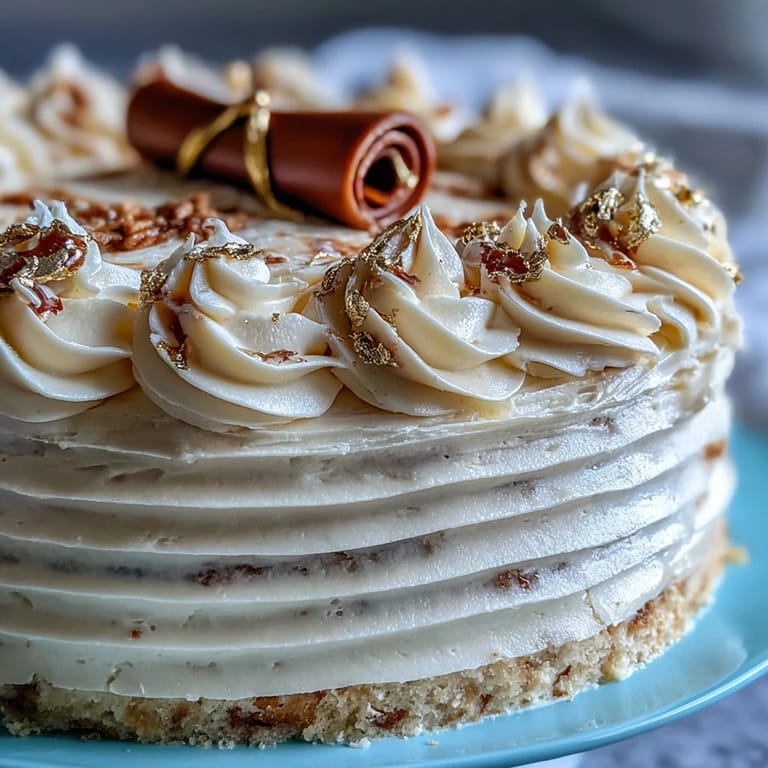
 My daughter stood in the kitchen doorway with that diploma in hand, and suddenly all those years of math homework help and permission slip signatures felt real. We needed a cake worthy of the moment—something that said celebration without trying too hard. That's when I decided on a classic vanilla sponge with gold accents, the kind of cake that looks like it belongs at an upscale party but comes together in your own kitchen. The gold foil caught the afternoon light streaming through the windows, and watching her face when she saw it made every piping swirl worth it.
I baked this cake at noon, frosted it by two, and by evening the dining room smelled like butter and vanilla mixed with fresh flowers and something like hope. My niece helped press the gold foil into place, her teenage fingers surprisingly gentle with the delicate sheets, and we laughed when one corner crumpled and we just smoothed it back down. That's the thing about homemade celebration cakes—the slight imperfections become the memories.
Ingredients
- All-purpose flour (2 ½ cups): This is your cake's foundation, and measuring by weight rather than scooping keeps the crumb tender instead of dense.
- Baking powder (2 ½ tsp): Don't skip this or halve it thinking less is more—it's what gives you those light, feathery layers.
- Unsalted butter (1 cup for cake, 1 ½ cups for frosting): Room temperature butter incorporates air, which means fluffier cake and smoother frosting that doesn't break when you spread it.
- Granulated sugar (2 cups): Creaming this with butter for a full 3–4 minutes isn't boring—it's building structure into your cake.
- Eggs (4 large, room temperature): Cold eggs refuse to blend properly and can seize your batter, so leave them out while you prep everything else.
- Vanilla extract (1 tbsp for cake, 2 tsp for frosting): This is where the flavor lives, so use real vanilla, not imitation.
- Whole milk (1 cup for cake, 3–4 tbsp for frosting): Room temperature milk blends seamlessly into the batter without shocking the temperature.
- Powdered sugar (5 cups, sifted): Sifting removes lumps before beating, which saves you from grainy frosting later.
- Edible gold foil sheets: These are delicate and require dry hands or tweezers—a small investment that transforms the cake into something gallery-worthy.
- Diploma-shaped cake topper: Store-bought saves time, but fondant toppers you make yourself feel more personal and taste better if anyone's brave enough to eat it.
Tired of Takeout? 🥡
Get 10 meals you can make faster than delivery arrives. Seriously.
One email. No spam. Unsubscribe anytime.
Instructions
- Set your oven and prepare the pans:
- Preheat to 350°F and grease those two 9-inch round pans, then line them with parchment paper so your layers release without sticking or tearing. This step takes two minutes and prevents heartbreak later.
- Dry ingredients come first:
- Whisk flour, baking powder, and salt together in a medium bowl—this distributes the leavening evenly throughout the cake. You're not mixing yet, just combining.
- Cream the butter and sugar until fluffy:
- Beat them together on high speed for a full 3–4 minutes until the mixture is pale and looks almost mousse-like. This is where the cake gets its tender crumb, so don't rush this.
- Add eggs slowly, with patience:
- Add each egg one at a time, beating well after each addition so it fully incorporates before the next one goes in. If you dump all four eggs in at once, your batter might break.
- Stir in the vanilla extract:
- Just a quick fold to distribute the vanilla throughout the butter mixture.
- Alternate dry and wet ingredients:
- Start with the flour mixture, then add milk, then flour again, always beginning and ending with dry ingredients. This keeps the batter from becoming too wet and tough.
- Mix until just combined:
- Stop as soon as you don't see dry flour streaks—overmixing develops gluten and toughens the cake. You want a smooth, pourable batter.
- Divide batter and bake:
- Split the batter evenly between pans and smooth the tops so they bake at the same rate. Bake for 28–32 minutes until a toothpick inserted in the center comes out clean or with just a few moist crumbs clinging to it.
- Cool with intention:
- Let the cakes sit in their pans for 10 minutes so they firm up enough to turn out without cracking, then transfer to wire racks for complete cooling. Trying to frost warm cake is a losing battle.
- Make the buttercream:
- Beat softened butter on high speed for 3 minutes until it's pale and creamy, then gradually add sifted powdered sugar so you don't end up with a cloud of sugar in your face. Add vanilla, salt, and milk a tablespoon at a time until you reach a smooth, spreadable consistency.
- Level your cake layers:
- Use a serrated knife or cake leveler to make both layers even—this creates a stable base for stacking. A wobbly cake is a frustrating cake.
- Build the cake:
- Place one layer on your serving plate, spread a thick layer of buttercream on top, then place the second layer over it. This is when baking starts to feel like assembly, which is oddly satisfying.
- Apply the crumb coat:
- Spread a thin layer of frosting all around the cake to seal in crumbs, then chill for 30 minutes so the cake doesn't shed crumbs into your final frosting. This step separates a polished cake from a crumbly mess.
- Final frosting:
- Apply your remaining buttercream smoothly and evenly, using an offset spatula dipped in warm water for a professional finish. Work with confidence—hesitation shows.
- Gold foil application:
- Using clean, dry tweezers, carefully apply edible gold foil sheets to your cake wherever you want that luxe look. The foil is delicate, but it sticks better than you'd think.
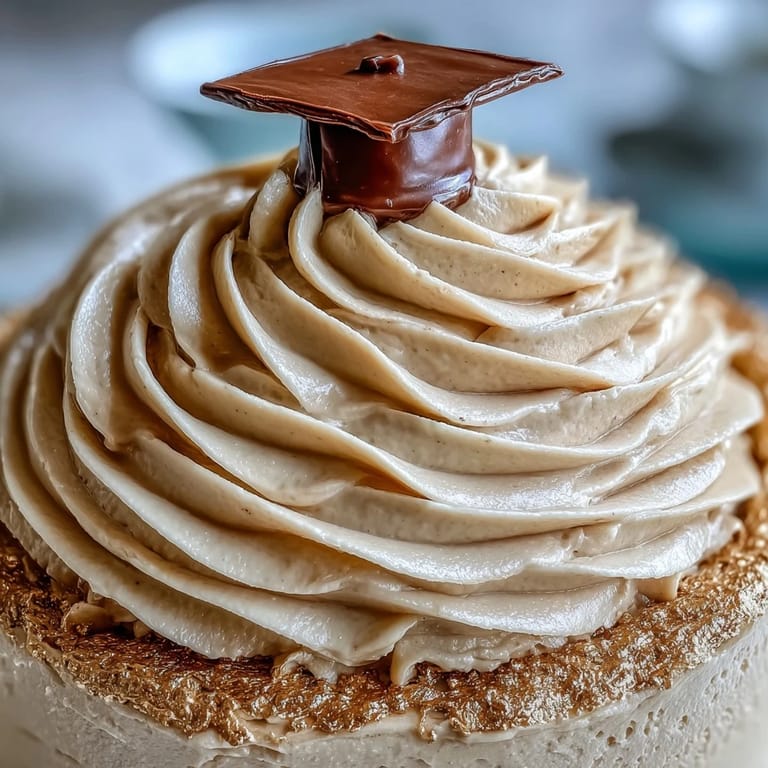
- Crown it with the diploma:
- Place the diploma topper at the center or slightly off to one side, then add sprinkles or confetti if you're feeling festive. Chill briefly to set everything, then serve at room temperature so the buttercream is soft enough to eat.
 Save to Pinterest
 When my son's friend came to the celebration, the first thing she asked wasn't about the diploma or the gold—it was whether the cake tasted as good as it looked. Her surprise when it actually did, when it was light and moist and not overly sweet, reminded me that a beautiful cake that tastes mediocre is just a prop. This cake delivers on both fronts.
Flavor Customization Ideas
The vanilla base is a blank canvas if you want to make this cake your own. Adding almond extract (just 1 teaspoon) brings an unexpected warmth that pairs beautifully with the gold aesthetic. I've also tinted the frosting with gel food coloring to match school colors—blues and golds are stunning together, and the cake becomes even more personalized. One year I added a tablespoon of lemon zest to the batter for brightness, and it transformed the entire flavor profile into something more spring-like and fresh.
Decorating Beyond the Gold
The gold foil and diploma topper are your statement pieces, but there's room to play with other elements that feel special. I've piped buttercream roses around the base, added fresh flowers in the corners (making sure they're food-safe and pesticide-free), and even written the graduate's name in edible marker on the cake board. The sprinkles and confetti mentioned in the ingredients are optional, but they add a joyful, celebratory texture that reads immediately as festive. Think about what makes this specific graduation unique and let that guide your decorating choices.
Make-Ahead Strategy and Storage
This cake is flexible enough to fit into a busy day—bake it the morning of the event, frost it in early afternoon, and chill it until serving time. If you're really planning ahead, you can bake the layers a day or two before and wrap them in plastic wrap, storing them at room temperature in a cool, dry place. The frosted, decorated cake can sit at room temperature for up to four hours before serving, or in the refrigerator for up to two days if you need to prepare further in advance.
- Bake layers the day before if your schedule is packed — wrapped layers stay moist and actually level easier when they've been sitting overnight.
- Frost the cake just before guests arrive unless you're chilling it — buttercream sets slightly in the fridge, making the texture less creamy when you serve it room temperature.
- If you apply gold foil more than two hours ahead, it may collect dust — apply it closer to serving time so it stays pristine and gleaming under the light.
 Save to Pinterest
 This cake is about more than flour and butter—it's about showing up for someone's milestone and doing it with care. Serve it with sparkling cider or champagne, let it sit at the center of the table where people can admire it, and enjoy watching someone feel celebrated.
Recipe Questions & Answers
- → How do I achieve a moist vanilla sponge?
Use room-temperature eggs and milk, and alternate adding dry and wet ingredients gently to avoid overmixing, ensuring a tender crumb.
- → What’s the best way to apply edible gold foil?
Use tweezers to delicately place gold foil on the cake, handling with dry hands to prevent tearing or sticking.
- → How can I make the buttercream smooth and spreadable?
Beat softened butter until creamy, then gradually add powdered sugar, vanilla, a pinch of salt, and milk to reach desired consistency.
- → Can I prepare the cake layers in advance?
Yes, bake and cool layers completely, then wrap tightly and refrigerate for up to two days before frosting and decorating.
- → Are there tips for decorating with the diploma topper?
Secure the topper gently in the center or side after applying gold foil, adding sprinkles or confetti for extra flair.